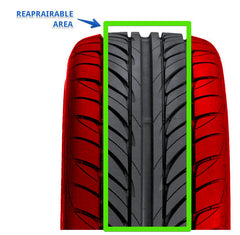
 One of the most common causes of tire damage is when an object, such as a nail or screw, causes a puncture injury to a tire. This usually leads to loss of air pressure and eventually a flat tire. According to the Tire Industry Association guidelines, the tire must be dismounted from the rim to perform an internal inspection and a proper repair. Without doing so, the technician cannot appreciate the full extent of the injury and he/she may miss an injury which should not be repaired.
There are limitations on repairs of puncture injuries. The maximum hole size is 1/4 inch and it should be within the crown of the tire, which is the center of the tire space (between the major tire grooves on each side of the tire). Repairs should not be done within 1-1/2 inches of the tire shoulder.
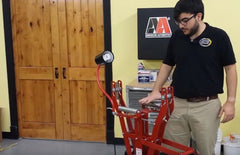 Step 1: Inspection of the dismounted tire
A thorough inspection of the tire lining and sidewalls should be performed while the tire is mounted in a well-lighted tire spreader. While wearing eye and hand protection, technicians should check the beads for defects, as well as any chips, cracks, cuts, or signs of improper repairs. The tread should be inspected to make sure there is at least 2/32 inch depth in any major groove.
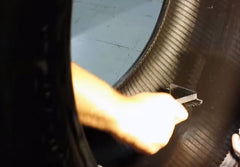 Step 2: Preparation of the Inner Liner Surface
Pre-buff Inner Liner Cleaner is a solvent which is applied around the injury to remove lubricants or any other contaminants from the liner surface. A scraper is then used to remove the superficial layer along with contaminants. A white grease pencil is used to create a circle about 1/2 inches larger than the patch diameter over the repair area.
Step 3: Cleaning the Injury Channel
A low-speed tire buffer with a carbide cutter tip is used to penetrate the injury channel to remove the damaged metal cables. Use a vacuum to remove dust.
Step 4: Select One-Piece or Two Piece Repair Units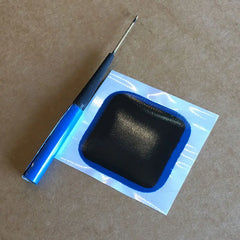 If a two-piece repair unit is selected, place an appropriately sized awl coated with vulcanizing cement into the channel. Next, apply a thin layer of vulcanizing cement on the cushion gum of the stem (Stems, Patches). Pull the stem from the inside to outside and trim with a rubber knife [product example]. Next, use a drill with a buffing head on a low speed (maximum of 5,000 RPM) to create a smooth platform for the repair patch. This should be done after the stem repair with vulcanizing cement has dried and has been trimmed. The buffing wheel (RMA#1 or #2) should be used to clean and level the area within the circular grease pencil mark. Next, a fine brass brush is used to clean off any fine particles and a vacuum is then used to remove dust and particles inside the tire. Vulcanizing cement is then applied to the inner liner around the injury and within the white circle and allowed to dry. The patch repair unit is carefully applied to the smooth surface by removing the plastic backing. A stitcher is rolled over the patch to remove excess air and ensure a firm bond. Apply a layer of inner liner sealer to the buffed area around and over the repair unit.
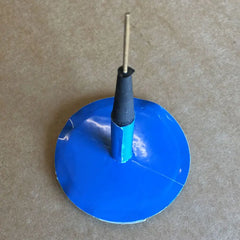 If a one-piece repair unit is chosen, after use a drill with a buffing head on a low speed (maximum of 5,000 RPM) to create a smooth platform for the repair patch. The buffing wheel should be used to clean and level the area within the circular grease pencil mark. Next, a fine brass brush is used to clean off any fine particles and a vacuum is then used to remove dust and particles inside the tire. Vulcanizing cement is then applied to a clean awl and it is placed in the injury channel as well as on the inner liner around the injury and along the stem of the one piece repair unit and allowed to dry. The one-piece patch repair unit is carefully applied after the guide-wire and stem is pulled through the channel until a slight dimple forms. Stitch the repair unit to remove air with a stitcher.
Cut the stem on the outside of the tire flush with the tread with a rubber knife.
The initial investment, not including tire machine or balancer to be able to do repairs ranges from $287 to $639. After that, the cost per repair is about $3.00.
September, 2016 ATS Technical Staff
Share this post
0 comment